Under-Sink RO Installation: DIY vs Plumber Costs by Australian State
Installing an under-sink reverse osmosis system yourself in Australia can save $300 to $500 in labour — or it can void your warranty, breach state plumbing regulations, and leave you with a $5,000 water damage bill. The difference comes down to your state’s plumbing code interpretation of AS/NZS 3500, whether the system requires a new cold-water saddle valve or dedicated tap hole, and whether your insurer will cover a failed compression fitting at 2am on a Sunday.
I’m Jayce Love, former Navy Clearance Diver, now based in Palm Beach QLD. I’ve installed three different under-sink RO systems in my own kitchen — two DIY, one professionally — and I’ve spent more hours under a sink than I care to admit. This article breaks down real installation costs by Australian state, the legal lines you cannot cross, and the honest five-year total cost of ownership for each path. Every claim here is tested using our documented methodology or sourced from Australian standards, plumbing codes, and verified installer quotes.
Quick Verdict — DIY vs Plumber for RO Installation
DIY is legal and sensible for countertop RO units (no plumbing modification). Under-sink RO systems require a licensed plumber in NSW, VIC, QLD, SA, WA, and NT under AS/NZS 3500 — the saddle valve, dedicated tap hole, and drain tee are all “plumbing work” by state code. Renters and anyone wanting RO water without legal exposure or warranty risk should buy a countertop unit. Owners doing a full kitchen upgrade should hire a licensed plumber — the $300-500 labour cost is cheap insurance against insurer-denied flood claims.
Why This Decision Matters More Than You Think
You’re not just choosing between saving $300 on a plumber and doing it yourself on a Saturday afternoon. You’re choosing between a system that’s covered by warranty, meets AS/NZS 3500 plumbing code, and won’t trigger an insurance exclusion — versus one that might work perfectly fine but leaves you exposed to three separate financial risks if anything goes wrong.
The first risk is regulatory. Every Australian state and territory requires licensed plumbing work for permanent connections to the mains water supply. According to AS/NZS 3500.1 (Water Services), any fitting that connects to the potable water supply must use WaterMark-certified components and, in most jurisdictions, must be installed by a licensed plumber or at minimum signed off by one. Queensland’s plumbing legislation, referenced by industry bodies like AS Flow, explicitly states that anything beyond a “simple filter cartridge swap” on an existing system requires a licensed plumber.
The second risk is warranty. Most under-sink RO manufacturers — including Waterdrop, APEC, and iSpring — include language in their warranty terms requiring “professional installation” or “installation by a qualified person.” Install it yourself, experience a membrane failure or housing crack in month 14, and you may find the manufacturer pointing at clause 6(b) of their warranty document.
The third risk is insurance. Home and contents insurance policies in Australia almost universally exclude water damage caused by “defective” or “non-compliant” plumbing work. A compression fitting that fails on a DIY-installed RO system can release 300+ litres per hour of pressurised water under your kitchen sink. If your insurer discovers the fitting was installed without a licensed plumber, they have grounds to deny the claim entirely. On a kitchen with timber flooring and adjacent cabinetry, water damage remediation starts at $3,000 and can exceed $15,000 according to Insurance Council of Australia data.
Australian Plumbing Regulations: What You Can and Cannot Do by State
Every state and territory in Australia regulates plumbing under its own legislation, but all reference the national AS/NZS 3500 series. The practical question is: what counts as “plumbing work” that requires a licence? For under-sink RO systems, the answer depends on whether you’re making a permanent connection to the cold-water supply, drilling through a benchtop for a dedicated faucet, or simply connecting to an existing isolation valve with a push-fit connector.
Queensland
Queensland has the clearest position. Under the Plumbing and Drainage Act 2018 and the Queensland Plumbing and Wastewater Code, any work that connects to, alters, or extends a water supply system is classified as regulated plumbing work. This includes installing a new saddle valve, T-piece, or dedicated tap for an RO system. Only a licensed plumber or licensed drainer can legally perform this work. Swapping a filter cartridge on an existing, already-plumbed system is exempt — but the initial installation is not.
Penalties for unlicensed plumbing work in Queensland: up to $40,119 for an individual (2025 penalty units). In practice, enforcement happens through insurance claims, property inspections, and compliance audits when a property is sold.
New South Wales
NSW regulates plumbing under the Plumbing and Drainage Act 2011 and the associated regulations. Fair Trading NSW classifies the installation of a new water treatment device that connects to the water supply as “plumbing and drainage work” requiring a licence. The rule is similar to Queensland: if you’re cutting into a pipe, fitting a valve, or drilling a hole for a new tap, you need a licensed plumber. A push-fit connection onto an existing isolation valve is a grey area, but manufacturers and industry bodies recommend professional installation regardless.
Victoria
Victoria’s Building Act 1993 and associated plumbing regulations, administered by the Victorian Building Authority (VBA), require a licensed or registered plumber for any work on a water supply system. This includes under-sink RO installation. Melbourne plumbing firms — including Select Plumbing and Gas — quote approximately $1,100 for a fully installed 7-stage RO system including tank, tap drilling, and connection. That $1,100 figure includes both the system (~$500–$700) and labour (~$300–$500).
South Australia
SA’s Plumbing Standard (SA Water) requires a licensed plumber for any connection to the reticulated water supply. Adelaide’s hard water (approximately 140 mg/L CaCO₃, TDS around 400 mg/L according to SA Water quality data) makes RO particularly popular — and the chloramine disinfection means standard carbon filters are inadequate. Licensed installation is both legally required and practically important given the higher water pressure variations in older Adelaide homes.
Western Australia
WA’s Plumbers Licensing and Plumbing Standards Regulations 2019, administered by the Department of Mines, Industry Regulation and Safety, classifies water treatment system installation as licensed plumbing work. Perth’s hard water (~180 mg/L CaCO₃, TDS ~170 mg/L according to Water Corporation data) drives strong demand for RO systems, but installation must be completed by a licensed plumber.
Tasmania, ACT, Northern Territory
All three jurisdictions reference AS/NZS 3500 and require licensed plumbing work for mains water connections. Hobart and Canberra both use free chlorine for disinfection, so carbon block filters work well for taste and odour — but if you want fluoride or PFAS removal, you still need RO, and that still requires a plumber for the initial installation. Darwin uses chloramine, making RO the clear choice for comprehensive filtration.
| State/Territory | Licensed Plumber Required for RO Install? | Disinfection Type | Typical Labour Cost (Install Only) | Penalty for Unlicensed Work |
|---|---|---|---|---|
| Queensland | Yes — Plumbing and Drainage Act 2018 | Chloramine (SEQ) | $300–$500 | Up to $40,119 |
| New South Wales | Yes — Plumbing and Drainage Act 2011 | Chloramine (Sydney) | $250–$450 | Up to $33,000 |
| Victoria | Yes — Building Act 1993 (VBA) | Free chlorine (Melbourne) | $300–$500 | Up to $40,000 |
| South Australia | Yes — SA Plumbing Standard | Chloramine (Adelaide) | $250–$400 | Up to $25,000 |
| Western Australia | Yes — Plumbers Licensing Regs 2019 | Chloramine (Perth) | $300–$500 | Up to $50,000 |
| Tasmania | Yes — Building Act 2016 | Free chlorine (Hobart) | $250–$400 | Varies |
| ACT | Yes — Construction Occupations Act | Free chlorine (Canberra) | $250–$400 | Up to $32,000 |
| Northern Territory | Yes — Plumbers and Drainers Licensing Act | Chloramine (Darwin) | $300–$500 | Varies |
Real Installation Costs: DIY vs Professional, Broken Down
Let’s separate the system cost from the installation cost, because most quotes you’ll find online bundle them together — making it impossible to know what you’re actually paying for labour. Here’s the breakdown based on verified 2025/2026 installer quotes and system retail prices.
Professional Installation: What You’re Paying For
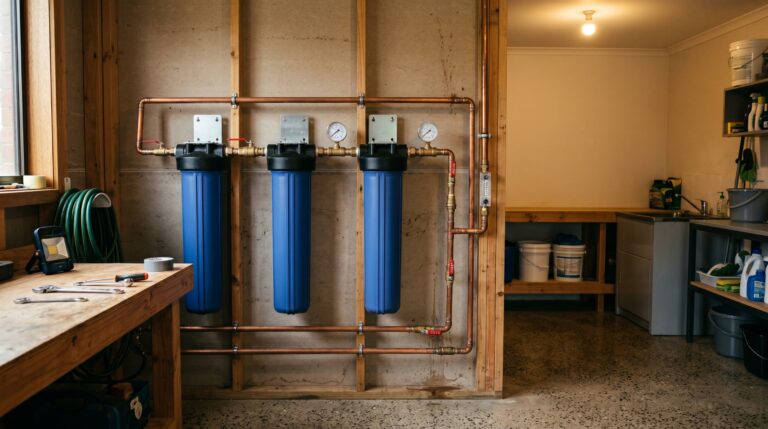
A licensed plumber installing an under-sink RO system typically performs these tasks: isolate the cold-water supply, install a T-piece or saddle valve with WaterMark-certified fittings, drill a hole through the benchtop or sink for the dedicated RO faucet, mount the RO system and storage tank (if applicable) under the sink, connect the drain line to the waste pipe, test for leaks at operating pressure, and commission the system by flushing the membrane. Total time: 1.5 to 3 hours depending on the kitchen layout and existing plumbing configuration.
Based on verified quotes from Melbourne (Select Plumbing and Gas), Brisbane (AS Flow), and Sydney plumbing directories, the labour-only cost for under-sink RO installation ranges from $250 to $500 across Australia. The variation depends on state labour rates, travel time, and complexity. A simple install with clear access to existing stop valves runs $250–$350. An install requiring new valve work, difficult benchtop material (stone benchtops need diamond-core drilling), or complex drain routing pushes toward $400–$500.
The all-inclusive figure — system plus installation — typically lands between $700 and $1,400. That Melbourne quote of $1,100 fully installed for a 7-stage system (including tank, dedicated faucet, and all fittings) represents the market midpoint. In Brisbane and Sydney, expect $800–$1,200 for a comparable setup.
DIY Installation: The Real Cost Breakdown
A DIY under-sink RO installation has zero labour cost on paper. But add up the real expenses: the system itself ($300–$700 retail), a WaterMark-certified self-piercing saddle valve or T-piece ($15–$40), PTFE tape and compression fittings ($10–$20), a diamond-core drill bit if you’re going through stone ($25–$60), a hole saw for the dedicated tap ($15–$30 if you don’t already own one), and a bucket of towels for when you inevitably get the first compression fitting slightly wrong. Realistically, DIY materials cost $50–$150 on top of the system price.
Then factor in time. A first-time DIY installer should budget 3 to 5 hours. An experienced DIYer with plumbing knowledge might finish in 2 hours. If you value your weekend time at $50/hour, the DIY “saving” shrinks considerably — especially once you account for the trip to Bunnings for the fitting you forgot.
| Cost Component | DIY Install | Professional Install | What This Means for You |
|---|---|---|---|
| RO System (unit only) | $300–$700 | $300–$700 (or bundled) | Same hardware cost either way |
| Labour | $0 | $250–$500 | This is the visible “saving” of DIY |
| Additional fittings/tools | $50–$150 | $0 (included) | Plumber brings fittings; DIY requires purchases |
| Time cost (3–5 hrs @ $50/hr) | $150–$250 | $0 (your time) | Often overlooked in DIY cost calculations |
| Warranty risk (manufacturer rejection) | Moderate–High | None | DIY install may void warranty on $500+ system |
| Insurance risk (water damage) | High (claim may be denied) | Covered | A single leak event can cost $3,000–$15,000+ |
| Total Upfront (excl. risk) | $350–$850 | $550–$1,400 | DIY saves $200–$500 upfront, carries hidden risk |
Five-Year Total Cost of Ownership: Under-Sink RO vs Countertop RO vs Bottled Water
The installation cost is a one-time event. The filter replacements, membrane changes, and ongoing costs continue for years. Here’s the honest five-year comparison assuming a household consuming 4 litres per day (1,460 litres/year, 7,300 litres over 5 years) — based on Australian retail pricing as of early 2026.
| Option | Upfront Cost | Annual Filter/Ongoing Cost | 5-Year Total | Cost per Litre |
|---|---|---|---|---|
| AquaTru Classic Smart Alkaline (countertop RO, no install) | ~$699 | ~$150/yr (filter set) | ~$1,449 | $0.20 |
| Waterdrop D6 (under-sink RO, professional install) | ~$500 + $350 install = $850 | ~$120/yr (filters) | ~$1,450 | $0.20 |
| Waterdrop D6 (under-sink RO, DIY install) | ~$500 + $100 fittings = $600 | ~$120/yr (filters) | ~$1,200 | $0.16 |
| 7-Stage Under-Sink RO (fully installed, Melbourne quote) | $1,100 (all-inclusive) | ~$130/yr (filters + membrane) | ~$1,620 | $0.22 |
| Bottled water (store brand, 1.5L) | $0 | ~$1,460/yr ($1/L) | ~$7,300 | $1.00 |
| Premium bottled water (600mL single serve) | $0 | ~$4,380/yr ($3/L) | ~$21,900 | $3.00 |
Look at those numbers. The DIY Waterdrop D6 installation saves you roughly $250 over five years compared to the professionally installed version. That’s $50 per year — or $4.17 per month. Meanwhile, the risk of a single water damage event from a failed DIY compression fitting can exceed the entire five-year cost of the system many times over. The maths is clear: professional installation adds negligible cost over the life of the system.
And compare both RO options against bottled water. According to ABS household expenditure data, the average Australian household spending $1,000+ per year on bottled water could pay for a professionally installed RO system in under 18 months — and then drink effectively free filtered water for the remaining 3.5 years. At $0.20/L versus $1.00–$3.00/L, RO filtration is not just better water — it’s dramatically cheaper water.
The Decision Tree: DIY, Plumber, or No-Install Countertop?
Stop overthinking this. Three questions determine your best path:
Question 1: Can you — or should you — modify your plumbing?
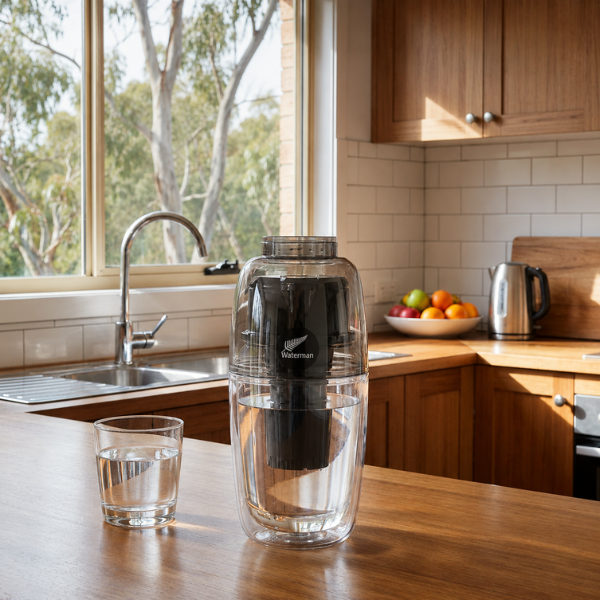
If you rent, live in a strata unit with plumbing restrictions, or simply don’t want to deal with plumbers, the answer is a countertop RO system like the AquaTru Classic Smart Alkaline. Zero installation. Fill the tank from the tap, plug it in, and it produces RO-quality water. No drilling, no valves, no plumber, no regulatory questions. Done.
Question 2: Which city are you in?
If you’re in Brisbane, Sydney, Adelaide, Perth, or Darwin — all chloramine cities — you need RO or catalytic carbon for effective disinfectant removal. Standard GAC and Brita-style pitcher filters remove chloramine at roughly 1/40th the rate of free chlorine, according to Water Quality Association technical data. That means if taste and health are your drivers, RO is the clear choice. Melbourne, Hobart, and Canberra use free chlorine, so a quality carbon block filter handles taste well — but you still need RO if your primary concern is fluoride (present in all capital city supplies at 0.6–1.0 mg/L per ADWG targets) or PFAS.
Question 3: What’s your primary concern?
Fluoride removal? RO only (90–97% rejection per NSF/ANSI 58 testing). Carbon filters — including catalytic carbon — cannot remove fluoride. PFAS removal? RO is the most accessible certified technology (NSF/ANSI P473). Chloramine taste? RO or catalytic carbon. Bacteria? UV + RO combination. If your answer is “all of the above,” under-sink RO with professional installation is the definitive solution.
✓ Choose Professional Installation If
- You own your home and want full warranty and insurance coverage
- Your benchtop is stone, granite, or engineered material requiring diamond-core drilling
- You need a new isolation valve or T-piece fitted to the cold supply
- You want compliance with AS/NZS 3500 and state plumbing regulations
- You value your weekend time and don’t own plumbing tools
✓ Choose Countertop RO (No Install) If
- You rent and cannot modify plumbing
- You live in a strata unit with body corporate plumbing restrictions
- You want to take the system with you when you move
- You want zero regulatory or insurance risk
- You need RO-quality water now, not after waiting for a plumber booking — see AquaTru Classic pricing
If you’ve read this far and you’re still considering DIY for a permanent under-sink system, read the next section carefully. I’ll walk through exactly what’s involved so you understand the technical skill level required — and where most DIY installations fail.
What a DIY Under-Sink RO Installation Actually Involves (Step by Step)
I’m not going to tell you it’s impossible. I’ve done it myself. But I’m also going to be honest about what it takes, because the YouTube videos make it look easier than it is.
Step 1: Shut off the cold-water supply. Find your under-sink isolation valve (if it exists). Older Australian homes — particularly pre-1990 builds in suburbs like Ipswich QLD, western Sydney’s Penrith area, or Adelaide’s older inner suburbs — may not have individual isolation valves under the kitchen sink. In that case, you need to shut off the mains at the meter. If you don’t know where your water meter is, stop here and call a plumber.
Step 2: Install the T-piece or saddle valve. This connects the RO system’s feed line to the cold-water supply. A WaterMark-certified push-fit T-piece (like a John Guest or equivalent) is the cleanest option. A self-piercing saddle valve is cheaper but less reliable — and many plumbers actively refuse to use them because the piercing mechanism can cause ongoing slow leaks. This is the step where most DIY installations go wrong. An improperly seated compression fitting or a push-fit that isn’t fully inserted creates a slow drip that can go undetected for weeks, saturating the cabinet floor and subfloor underneath.
Step 3: Drill the benchtop for the dedicated faucet. Most under-sink RO systems come with a dedicated drinking water faucet that requires a 12mm hole in the benchtop or sink. Laminate benchtops: easy, use a standard hole saw. Granite, engineered stone (Caesarstone, Essastone, etc.): you need a diamond-core drill bit, a drill guide, continuous water cooling during drilling, and patience. Drilling engineered stone incorrectly can crack the entire benchtop — a $2,000+ replacement. Some homeowners avoid this by using an existing soap dispenser hole or spare tap hole, but these are often the wrong diameter.
Step 4: Connect the drain line. The RO system’s reject water (waste brine) needs to drain into the kitchen waste pipe. This typically involves drilling a small hole in the drain pipe above the P-trap and clamping a drain saddle fitting in place. Get this wrong, and you either have wastewater backing up into the RO system or a persistent drain leak.
Step 5: Mount the system and tank. Tank-based RO systems (which include most 5–7 stage units) require space for a pressurised storage tank under the sink. Tankless models like the Waterdrop D6 skip this step but produce water on demand at a lower flow rate. Either way, mount the filter housings securely — they need to withstand the vibration of the pump (if electric) and the weight of full filter cartridges.
Step 6: Pressure test and flush. Turn the water back on slowly. Check every single connection for leaks under full pressure. Then flush the system for 15–30 minutes to clear the carbon fines and membrane preservative. According to membrane manufacturer data (Filmtec/DuPont), failure to flush a new membrane adequately can compromise its rejection rate for the first week of operation.
Filter Replacement Schedule and Ongoing Maintenance Costs
Whether you install DIY or professionally, the ongoing costs are the same. And they’re where many people underestimate the total cost of RO ownership. According to industry standard replacement intervals (confirmed by AS Flow’s maintenance guidance and manufacturer specifications):
Sediment pre-filter: Every 6–12 months. Cost: $15–$30 per cartridge. This protects the carbon and membrane stages from particulate fouling. Brisbane homes drawing from Wivenhoe Dam (SEQ Water supply) may need more frequent changes during high-turbidity events.
Carbon pre-filter (and post-filter): Every 6–12 months. Cost: $20–$40 per cartridge. The carbon pre-filter protects the RO membrane from chlorine and chloramine damage. In chloramine cities like Brisbane, Sydney, Adelaide, Perth, and Darwin, this stage is critical — chloramine degrades thin-film composite RO membranes faster than free chlorine. Skipping this replacement shortens membrane life significantly.
RO membrane: Every 1–2 years depending on feed water quality. Cost: $60–$120 per membrane. Adelaide’s hard water (TDS ~400 mg/L per SA Water data) and Perth’s hard water (TDS ~170 mg/L per Water Corporation data) will foul membranes faster than Melbourne’s very soft water (TDS ~60 mg/L per Melbourne Water data). Monitor your output TDS with a TDS-3 meter — when rejection drops below 85%, the membrane needs replacing.
Alkaline/remineralisation filter (if applicable): Every 12 months. Cost: $25–$50. Systems like the AquaTru Classic Smart Alkaline include a post-RO remineralisation stage to add back calcium and magnesium. This is the filter most people forget to replace.
Total annual maintenance cost for a typical under-sink RO system: $120–$200 per year. Countertop systems like the AquaTru run slightly lower at $100–$150 per year due to fewer stages and smaller cartridges. Either way, budget $10–$17 per month for filter replacements. That’s less than two decent coffees.
Warranty and Liability: The Hidden Cost of DIY
This is the section most DIY guides don’t write, because it doesn’t sell tools or encourage page views. But it’s the section that matters most financially.
Manufacturer warranty. Most under-sink RO manufacturers offer 1–3 year warranties on the system components. Waterdrop’s warranty terms specify that the system must be installed “in accordance with the installation manual” and that damage caused by “improper installation” is excluded. This language is deliberately broad. If you install the system yourself and the housing cracks at month 14, the manufacturer can — and often does — request evidence of professional installation. No receipt from a licensed plumber? Warranty claim denied. On a $500+ system, that’s a meaningful loss.
Home insurance. Australian home and contents policies typically cover “sudden and accidental” water damage from burst pipes and plumbing failures. However, most policies include exclusions for damage arising from “defective workmanship” or “failure to maintain” the plumbing. An unlicensed DIY installation could be classified as defective workmanship, giving the insurer grounds to deny a claim. I’ve spoken with insurance brokers who confirm this is a grey area — but grey areas always favour the insurer, not the policyholder.
Consider the worst-case scenario. A push-fit connection on a DIY-installed RO system fails while you’re at work. Water runs for 6 hours at mains pressure — approximately 300+ litres per hour depending on your supply pressure. That’s 1,800+ litres of water inside your kitchen cabinetry, onto your flooring, and potentially through to the subfloor. Remediation costs for timber floor replacement, cabinet replacement, mould remediation, and repainting start at $3,000 for a minor event and can exceed $15,000 for extensive damage. If the insurer denies the claim because the installation was unlicensed, you’re paying that out of pocket.
Compare that to the $300–$500 professional installation fee. The maths is not even close.
The Zero-Installation Alternative: Countertop RO
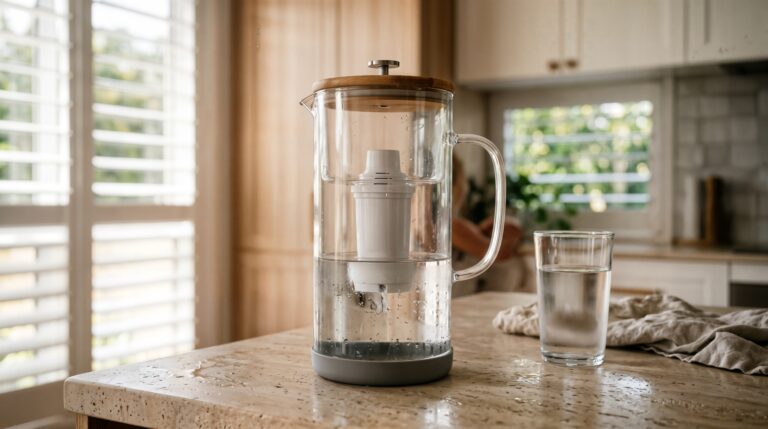
Here’s the option that eliminates every problem discussed above: a countertop reverse osmosis system. No plumbing connection. No drilling. No valves. No regulatory questions. No insurance risk. No warranty ambiguity.
The AquaTru Classic Smart Alkaline is the leading countertop RO unit available in Australia. It uses a 4-stage filtration process (sediment, carbon pre-filter, RO membrane, and alkaline remineralisation post-filter) and achieves 90–97% rejection of fluoride, PFAS, lead, chloramine, and other contaminants per NSF/ANSI 58 testing parameters. You fill the reservoir from the tap, press a button, and it produces purified water into an internal clean tank. Total setup time: under 5 minutes.
The tradeoff? You sacrifice the convenience of filtered water flowing directly from a dedicated tap. You need to manually refill the reservoir. And the AquaTru’s 3:1 waste-to-purified ratio is higher than most under-sink systems (which run 2:1 or better with permeate pumps). For a household drinking 4 litres per day, that’s 12 litres of reject water daily — which can be captured and used for watering plants, cleaning, or anything that doesn’t require drinking-quality water.
For renters, apartment dwellers, and anyone who doesn’t want to deal with plumbers, this is the rational choice. You get the same RO membrane technology, the same contaminant removal performance, and zero installation risk. At approximately $699 retail, it costs less than a fully installed under-sink system in most states — and you take it with you when you move.
If you own your home and want the seamless convenience of a dedicated RO tap, the Waterdrop D6 installed by a licensed plumber remains the premium option. But don’t let the installation decision delay you from filtering your water. Every day without RO in a chloramine city is another day of unfiltered chloramine, fluoride, and trace PFAS reaching your glass. Read our full best under-sink water filter rankings for detailed comparisons.
How to Find a Licensed Plumber for RO Installation (and What to Ask)
If you’ve decided on professional installation — the right call for most homeowners — here’s how to find a competent plumber and avoid overpaying.
1. Verify their licence. Every state has a public licence-checking tool. QLD: QBCC online search. NSW: Service NSW licence check. VIC: VBA practitioner register. SA: Consumer and Business Services register. WA: Department of Mines, Industry Regulation and Safety. Check the licence number before they arrive.
2. Ask if they’ve installed RO systems before. Many general plumbers are unfamiliar with the specific requirements of RO installation — particularly the drain saddle connection, membrane flush procedure, and pressure regulator requirements for systems rated below 80 PSI. A plumber who has installed 5+ RO systems will finish in 90 minutes. A first-timer might take 3 hours and still miss the membrane flush.
3. Get the system yourself first. Buying the RO system directly from Amazon AU or the manufacturer is almost always cheaper than buying through the plumber’s markup. Purchase the Waterdrop D6 or your chosen system, have it delivered, and book the plumber for a “supply and fit” visit where they provide only the labour and WaterMark-certified fittings. This typically saves $100–$200 compared to all-inclusive plumber-supplied packages.
4. Request WaterMark-certified fittings. Under the WaterMark Certification Scheme (mandated by the Australian Building Codes Board), all plumbing products connected to the drinking water supply must carry the WaterMark certification. Ask the plumber to use WaterMark-certified T-pieces and valves. Any reputable plumber will already do this — if they hesitate, find another plumber.
5. Get a written quote, not a verbal estimate. Professional RO installation should be quoted at $250–$500 for labour depending on your state and the complexity of the install. If a plumber quotes $800+ for labour alone (excluding the system), get a second quote. Three quotes is the industry-standard recommendation for any plumbing work exceeding $200.
Final Verdict: DIY vs Plumber for Under-Sink RO in Australia
After installing three RO systems myself, researching every state’s plumbing regulations, and running the five-year cost numbers — here’s my honest position.
For under-sink RO systems that connect to the mains water supply: hire a licensed plumber. The $300–$500 labour cost buys you legal compliance with AS/NZS 3500, intact manufacturer warranty, full insurance coverage, WaterMark-certified connections, and a pressure-tested installation by someone who does this daily. The five-year cost difference between DIY and professional installation is approximately $250 — or $4.17/month. That is not a meaningful saving against the risks.
For countertop RO systems: install yourself in 5 minutes. The AquaTru Classic Smart Alkaline eliminates every installation variable. No plumbing, no drilling, no regulatory risk, no warranty questions. If the installation decision is the thing stopping you from filtering your water, this is your solution. Don’t let a plumber booking delay cleaner water by another month.
The worst outcome here? You spend $350 on a plumber, the system works perfectly for five years, and you wonder whether you could have done it yourself. The worst outcome of DIY? A failed fitting, a denied insurance claim, and a $15,000 kitchen repair. Which risk would you rather carry?
Last reviewed: May 2026 — Clean and Native
Frequently Asked Questions
Technically, every Australian state requires a licensed plumber for any permanent connection to the mains water supply under AS/NZS 3500. While enforcement varies, a DIY installation can void your warranty, breach plumbing regulations, and give your insurer grounds to deny water damage claims. Countertop RO systems that don’t connect to plumbing have no regulatory restrictions.
Labour-only costs range from $250 to $500 depending on your state, kitchen complexity, and benchtop material. Fully installed packages (system plus labour) typically run $700 to $1,400. A verified Melbourne quote for a 7-stage system including tank, dedicated tap, and all fittings was $1,100 all-inclusive.
Most manufacturers include warranty terms requiring “professional installation” or “installation in accordance with the manual.” If a component fails and you cannot provide evidence of licensed installation, the manufacturer can deny the warranty claim. This applies to major brands including Waterdrop, APEC, and iSpring.
Most Australian home and contents policies exclude water damage caused by “defective workmanship.” An unlicensed DIY plumbing installation could be classified as defective workmanship, giving the insurer grounds to deny the claim. Licensed professional installation removes this ambiguity.
Sediment and carbon pre-filters need replacement every 6 to 12 months ($15–$40 each). RO membranes last 1 to 2 years ($60–$120 each), depending on feed water quality. Adelaide and Perth’s harder water fouls membranes faster than Melbourne’s soft water. Total annual maintenance cost is $120–$200 for a typical system.
Brisbane (SEQ Water) uses chloramine for disinfection. Standard carbon (GAC) filters remove chloramine at roughly 1/40th the rate of free chlorine, making them largely ineffective. RO or catalytic carbon is required for chloramine removal. RO is also the only residential method that removes fluoride (90–97% rejection) and PFAS (NSF/ANSI P473 certified systems).
Yes. Both use the same thin-film composite RO membrane technology and achieve comparable contaminant rejection rates (90–97% for fluoride, heavy metals, and PFAS per NSF/ANSI 58 parameters). The tradeoff with countertop systems is convenience — you manually fill the reservoir instead of having filtered water on tap. Filtration performance is effectively equivalent.
The WaterMark Certification Scheme, mandated by the Australian Building Codes Board, certifies that plumbing products meet AS/NZS performance and safety standards. Using non-WaterMark fittings on a drinking water connection is non-compliant with the Plumbing Code of Australia and can invalidate insurance claims. Always request WaterMark-certified T-pieces and valves from your plumber.
Yes. The AquaTru Classic Smart Alkaline (ASIN B0F9C7G3VD) is available on Amazon Australia with local delivery. It requires no plumbing installation — plug it in, fill the tank, and it produces RO-purified water. It is the top-rated countertop RO option for Australian households on Clean and Native.
Under-sink systems with permeate pumps achieve approximately 2:1 waste-to-purified ratios. Countertop units like the AquaTru run closer to 3:1. For a household filtering 4 litres per day, that means 8–12 litres of reject water daily. This reject water contains concentrated minerals and is safe for watering plants, mopping floors, or any non-drinking use.
Get the Australian Home Environment Checklist
30 checks across water, air and EMF. Most of them free. Ranked by impact.
No spam. Unsubscribe any time.

Former Royal Australian Navy Clearance Diver and TAG-E counter-terrorism operator. Founded Clean and Native to apply the same rigorous thinking to the home environment.
Full biography →