First Flush Diverters for Rainwater Tanks 2026
Drafted with AI assistance and checked against published specifications and certifications. First-hand measurements appear only where stated. How we make content
A first flush diverter captures the dirtiest initial runoff from your roof — bird droppings, dust, pollen, leaf tannins, possum faeces — and diverts it away from your rainwater tank before clean water enters storage. According to Australian research cited by harvesth2o.com, tank water quality improves “dramatically” when a correctly sized first flush diverter is installed, and Sydney Water lists first flush devices as a recommended component for maintaining safe rainwater tank systems.
| Diverter Type | What It Does | Verdict |
|---|---|---|
| Standpipe (fixed-volume chamber) | Fills a vertical pipe with dirty water first; clean water overflows into tank once pipe is full. Drains slowly via a weep hole. | Recommended — simple, reliable, lowest cost |
| Valve-based (ball-float or mechanical) | A floating ball or mechanical valve seals the diverter chamber once full, redirecting flow to the tank automatically. | Recommended for larger roofs — more precise cutover |
| No first flush device | All roof runoff enters tank including initial contaminated wash. Sediment, bacteria, and chemical load enter storage. | Avoid — significantly degrades water quality |
For most Australian homes with a rainwater tank, a standpipe-type first flush diverter is the single cheapest upgrade that makes the biggest difference to water quality. The rule of thumb is 1 litre of diversion capacity per square metre of connected roof area. A typical 100 m² roof needs a diverter chamber of at least 100 litres. This is not a substitute for downstream filtration — you still need sediment and carbon stages if you are drinking the water — but it dramatically reduces the load those filters have to handle, extending their lifespan and protecting your pump from sediment damage.
Key catches
- A first flush diverter does not filter water — it only removes the worst initial slug of contamination before it reaches the tank
- Sizing matters: undersized diverters let contaminated water into the tank; oversized diverters waste clean rainwater
- The diverter chamber must be manually drained and cleaned at least every 3 months (more often in dusty or high-pollen areas like western Sydney, inland QLD, or Adelaide)
- If you drink your tank water, you still need downstream filtration — a first flush diverter alone does not make rainwater potable
What a First Flush Diverter Actually Does (and Why Your Tank Needs One)
Between rain events, your roof collects everything the sky, the trees, and the local wildlife deposit on it. Bird droppings. Possum faeces. Dust. Pollen. Leaf tannins. Insect carcasses. Overhanging eucalyptus oil residue. In bushfire-prone areas of NSW, Victoria, and QLD, it also collects fine ash and particulate matter that can persist on roofing for weeks after a smoke event.
When rain finally arrives, the first few minutes of runoff carry the highest concentration of this accumulated contamination. According to the World Health Organisation’s guidelines on rainwater harvesting, the initial roof washings at the start of each rain event contain the majority of the microbial and chemical load. The WHO specifically recommends a “wash-out drain tap or diverter” to intercept this initial slug before it enters storage.
A first flush diverter is a simple plumbing device installed between your downpipe and your tank inlet. It captures a fixed volume of the initial dirty runoff — typically in a sealed vertical chamber — and holds it separate from the tank. Once the chamber is full, clean rainwater bypasses the diverter and flows into your tank. Between rain events, the captured dirty water slowly drains out of the chamber through a small weep hole or drain valve, ready to capture the next first flush.
This is not filtration. The diverter does not remove dissolved contaminants, kill bacteria, or treat the water in any way. What it does is remove the most contaminated slug — the water carrying the highest bacterial count, the heaviest sediment load, and the darkest colour — before it ever reaches your tank. For drinking water safety, you still need downstream filtration. But the diverter dramatically reduces what those downstream filters have to deal with, which extends filter life, protects pumps, and keeps your tank water cleaner for longer.
Why First Flush Matters Specifically in Australia
Australia’s climate creates conditions that make first flush diversion more critical here than in many other countries. Long dry periods between rainfall events — weeks or months in inland areas, even 10-14 days in coastal QLD and NSW during winter — mean contamination accumulates on roofs to levels that would not occur in temperate climates with regular rain. The longer the dry spell, the more contaminated the first flush becomes.
Consider what is actually on your roof between rain events in different parts of Australia:
| Region | Dominant Contaminants | Impact on First Flush Volume |
|---|---|---|
| Coastal QLD/NSW (Brisbane, Gold Coast, Sunshine Coast, northern NSW) | Pollen (Sept-Nov peak), bat/bird droppings, mould spores, eucalyptus oil residue | Moderate — regular rain events reduce accumulation, but humidity promotes biological growth |
| Western Sydney, Penrith, Hunter Valley, inland NSW | Fine dust, bushfire ash (Oct-Mar), industrial fallout, bird droppings | High — long dry periods + dust = heavy first flush. Size up by 25-50% |
| Adelaide, SA regional | Dust, bird droppings, agricultural spray drift (rural), pollen | High — dry Mediterranean climate means extended accumulation periods |
| Melbourne, Geelong, Ballarat | Leaf litter (deciduous trees), pollen, bird droppings, lichen/moss debris | Moderate — more frequent rain, but autumn leaf load can be extreme |
| Perth, WA regional | Dust, pollen, bird droppings, bore water mineral deposits (if using evaporative cooling on roof) | Very high — long dry summers (Dec-Apr with almost zero rain) create massive first flush loads |
| Rural/regional Australia (inland QLD, NSW, VIC, SA, WA) | Red dust, agricultural chemical drift, animal faeces (possums, rodents, birds), leaf litter | Very high — many properties depend on tank water as sole supply. Size first flush generously. |
Sydney Water’s rainwater tank maintenance guidelines specifically recommend first flush devices as part of a properly maintained tank system. For properties in the Sydney catchment, this is not optional advice — it is part of Sydney Water’s published guidance for homeowners operating rainwater tanks. The WHO’s international rainwater harvesting guidelines align: intercepting the initial wash is the single most impactful action for improving stored rainwater quality, short of full treatment.
If your property relies on tank water as a primary or sole drinking supply — which describes hundreds of thousands of rural and peri-urban Australian homes — a first flush diverter is not an optional accessory. Without one, every contaminant that lands on your roof between rain events goes directly into the water you drink, cook with, and bathe in. That is the problem a $50-200 device solves.
How to Size a First Flush Diverter for Your Roof
The standard Australian rule of thumb is 1 litre of diverter capacity per square metre of connected roof area. “Connected roof area” means only the portion of your roof that drains into the downpipe feeding your tank — not your total roof area.
For a typical suburban home with 100 m² of roof connected to a single tank via one or two downpipes, that means 100 litres of total first flush capacity. If you split this across two downpipes, each downpipe needs a 50-litre diverter.
| Connected Roof Area | Baseline Diverter Volume | High-Contamination Zone* | Typical Diverter Pipe Length (90mm PVC) |
|---|---|---|---|
| 50 m² | 50 L | 65-75 L | ~8 m |
| 100 m² | 100 L | 125-150 L | ~16 m |
| 150 m² | 150 L | 190-225 L | ~24 m (consider multiple units) |
| 200 m² | 200 L | 250-300 L | Multiple units across downpipes |
*High-contamination zones: Perth metro, Adelaide, inland NSW/QLD, bushfire-prone areas, properties under heavy tree canopy, or any location with dry periods exceeding 3-4 weeks between rain events. Size up 25-50%.
Undersizing is the most common mistake. A diverter that is too small fills quickly and starts sending contaminated water into your tank before the roof is properly washed. Oversizing wastes some clean rainwater, but that is a far smaller problem than drinking water contaminated with bird faeces and accumulated dust. When in doubt, size up.
Calculating connected roof area
If you do not know your connected roof area, the simplest method is to measure the footprint of the part of your house that drains to the relevant downpipe. You do not need to climb on the roof — measure the ground-level footprint and multiply by 1.0 (for a flat or low-pitch roof) or 1.1-1.2 (for a steep-pitch roof, which has a slightly larger surface area than its footprint). For most suburban homes, the footprint measurement is close enough.
For sheds and outbuildings feeding a separate tank, the same 1 L/m² rule applies. A 60 m² shed roof needs a 60-litre diverter. Simple as that.
Standpipe vs Valve-Based Diverters: Which Type Suits Your Setup
There are two main categories of first flush diverter sold in Australia, and the choice comes down to your roof size, budget, and how much maintenance you are willing to do.
Standpipe (fixed-volume chamber) diverters
The simplest and most common type. A vertical section of PVC pipe (typically 90mm or 100mm diameter) is plumbed into the downpipe run before the tank inlet. Dirty first flush water fills this vertical chamber from the bottom up. Once the chamber is full, incoming rainwater bypasses it via a tee fitting and flows into the tank.
A small weep hole or slow-drain fitting at the bottom of the standpipe allows the captured dirty water to drain out slowly between rain events — typically over 12-48 hours — so the chamber is empty and ready for the next rain. Some designs use a manually operated ball valve at the base instead of a weep hole, giving you more control but requiring manual operation.
Advantages: No moving parts (in weep-hole designs). Lowest cost ($30-80 for DIY PVC components, $80-180 for pre-made units). Extremely reliable — nothing to fail mechanically. Easy to build from standard plumbing components if you are handy. Transparent inspection windows are available on some commercial units, so you can see how much contamination has been captured.
Limitations: Weep holes can clog with debris and need periodic clearing. Fixed volume — does not adapt to varying contamination levels. Long standpipes (for large roof areas) can be unwieldy and may need wall mounting support. If the weep hole drains too slowly and rain returns before the chamber has emptied, the diverter is partially full and captures less of the next first flush.
Valve-based (ball-float or mechanical) diverters
These use a floating ball or mechanical valve inside the diverter chamber. As dirty water fills the chamber, a ball floats upward until it seals against a seat at the top, blocking the diverter inlet and forcing all subsequent water to flow through to the tank. Some designs use a dependent float that tips a lever, closing a valve.
Advantages: More precise cutover from divert to tank-fill — the ball seal creates a definitive transition point rather than relying on the standpipe reaching capacity. Better suited to larger roof areas where precise volume control matters. Some models can be adjusted for different diversion volumes.
Limitations: Moving parts can stick, corrode, or fail — especially in hard water areas like Adelaide (TDS ~400 mg/L) and Perth (TDS ~170 mg/L), where mineral buildup on valve seats is a real issue. Higher cost ($120-300 for commercial units). More maintenance required — ball valves and float mechanisms need inspection and cleaning at least twice a year.
| Factor | Standpipe | Valve-Based |
|---|---|---|
| Typical price (AU) | $30-180 | $120-300 |
| Moving parts | None (weep-hole design) | Ball float or lever mechanism |
| Maintenance frequency | Every 3 months (clear weep hole, drain sludge) | Every 2-3 months (inspect valve, clear mechanism, drain chamber) |
| Failure mode | Clogged weep hole (easy to clear) | Stuck or corroded valve (harder to fix) |
| DIY install difficulty | Low — standard PVC fittings | Moderate — alignment of float mechanism matters |
| Best suited for | Roofs under 150 m², budget-conscious, DIY | Larger roofs, precision-sensitive, existing plumber involvement |
For most Australian homeowners, the standpipe design is the right choice. It is cheaper, simpler, and has fewer failure modes. Unless you are dealing with a connected roof area above 150 m² or need precise volume control for a specific reason, the standpipe does the job reliably for years with minimal attention.
Where to Buy First Flush Diverters in Australia
First flush diverters are sold through several channels in Australia. The most relevant for homeowners:
Rural and irrigation supply stores: This is where you will find the widest range and the most knowledgeable staff. Stores like Rural King, Irrigear, and Total Eden (WA) stock multiple brands and sizes, and staff at these outlets deal with tank water systems daily. If you are in a regional area, your local rural supply store is the first stop.
Hardware chains: Major hardware retailers stock basic first flush kits in the rainwater tank accessories section, typically in the $60-150 range for pre-made units. These are adequate for standard suburban installations but the range is limited compared to specialist stores.
Plumbing supply outlets: Reece, Tradelink, and similar plumbing wholesalers stock first flush components and can supply WaterMark-certified fittings for installations that require compliance documentation. If your local council requires WaterMark certification on rainwater plumbing components (some do, particularly in NSW and QLD for new builds), this is the channel to use.
Online: Several Australian-based suppliers sell first flush diverters online with delivery. Rain Harvesting Pty Ltd (an Australian company) manufactures a well-regarded range of first flush diverters with transparent inspection chambers, available through their website and various resellers. Online purchasing is practical for pre-made units but less useful if you need to match specific pipe sizes or fittings to existing plumbing.
DIY from plumbing components: If you are comfortable with PVC plumbing, you can build a standpipe diverter from standard 90mm PVC stormwater pipe, a tee fitting, an end cap, and a small brass weep fitting. Total material cost is typically $30-60 from any plumbing supply outlet. This is the most cost-effective option and allows you to size the diverter precisely to your roof area.
Expect to pay between $50 and $200 for a commercial pre-made first flush diverter suitable for a typical suburban roof. High-end valve-based units for large roofs can reach $300. Professional installation by a plumber adds $100-250 depending on complexity and access. Many homeowners install standpipe diverters themselves in under two hours.
Maintenance: The Step Most Australians Skip
A first flush diverter that is never maintained is worse than no diverter at all. Here is why: if the drain mechanism clogs and the chamber stays full of stagnant dirty water, the next rain event sends overflow directly into your tank — and that overflow has been sitting in contact with concentrated contamination. It is dirtier than the original first flush would have been.
Sydney Water’s published maintenance guidance for rainwater tanks includes checking first flush devices as part of the recommended schedule. The WHO’s rainwater harvesting guidelines similarly emphasise that first flush systems require regular inspection to remain effective.
Quarterly maintenance schedule (minimum)
Every 3 months (or monthly in high-contamination areas):
- Drain the chamber completely. Open the drain valve (if fitted) or remove the end cap to flush out accumulated sludge. You will see dark, foul-smelling water with sediment — this is exactly what you are keeping out of your tank.
- Clear the weep hole or drain fitting. Use a small wire or pipe cleaner to clear any debris from the slow-drain orifice. This is the most common failure point — a blocked weep hole means the chamber never empties between rain events.
- Inspect the chamber for buildup. If your diverter has a transparent section, check for algae growth or heavy sediment accumulation. A garden hose flush through the chamber clears most buildup.
- Check pipe connections and seals. Look for cracks, loose fittings, or insect nests (wasps love PVC pipe openings). Ensure the chamber is still plumb if wall-mounted.
After every major storm or extended dry period (4+ weeks without rain):
- Manually drain the diverter before the next rain if possible. After a long dry spell, the first flush load will be heavy. If you know rain is coming and the diverter chamber is partially full from the last event, drain it manually so it has full capacity available.
- Inspect the roof gutter and leaf screens. A clogged gutter can bypass the diverter entirely, sending leaf-laden water straight into the tank overflow.
For valve-based diverters, add:
- Test the ball valve or float mechanism every 3 months. Manually lift the float to confirm it moves freely and seals correctly. In hard water areas (Adelaide, Perth), mineral scale can prevent the ball from seating, which means the diverter never closes and first flush water enters the tank indefinitely.
- Replace degraded seals annually. Rubber and silicone seals in valve mechanisms degrade in Australian UV and heat. Budget $10-20 per year for seal replacement kits.
Combining a First Flush Diverter with Downstream Filtration
A first flush diverter is the first stage in a multi-barrier approach to tank water quality. It handles the coarse contamination — the heavy sediment, the worst bacterial load, the visible discolouration. But it does not make water safe to drink on its own. For potable use, you need downstream treatment.
The complete system, in order from roof to tap:
- Leaf guard / gutter mesh — stops leaves and large debris entering the downpipe
- First flush diverter — removes the initial contaminated slug of roof wash
- Tank inlet screen / mosquito mesh — prevents insect breeding and larger particulate entry
- Sediment pre-filter (5-20 micron) — catches fine particulate that passed the first flush
- Carbon block filter (1-5 micron, catalytic if treating chloramine-dosed mains backup) — removes taste, odour, VOCs, and some chemicals
- UV sterilisation — kills bacteria, viruses, and protozoa including Cryptosporidium and Giardia
- Reverse osmosis (optional) — removes dissolved contaminants including heavy metals, PFAS, and fluoride if the tank is supplemented with mains water
The first flush diverter’s primary ROI in this system is protecting stages 4-7. Without it, your sediment filter clogs faster (weeks instead of months), your carbon block exhausts sooner, and your UV lamp effectiveness drops as turbidity increases (UV cannot penetrate cloudy water). A $50-200 diverter can save you $200-500 per year in filter replacements alone — not to mention extending pump life by keeping abrasive sediment out of the impeller.
For detailed guidance on choosing the right filtration stages for tank water, see our best bore and tank water filter guide. If you are trying to determine whether your tank water is safe to drink in its current state, start with our rainwater drinking safety guide for Australia.
Common Mistakes That Defeat the Purpose of a First Flush Diverter
After reviewing dozens of Australian tank installations and manufacturer guidelines, these are the recurring errors that render first flush systems ineffective:
1. Undersizing the diverter chamber. The most frequent mistake. A 20-litre diverter on a 100 m² roof captures only 20% of the recommended first flush volume. The remaining 80 litres of contaminated water goes straight into your tank. If you are going to install one, size it properly — 1 L per m² minimum, more in dusty or dry areas.
2. Never cleaning the weep hole. A clogged weep hole means the chamber never empties. Next rain event, the full chamber immediately overflows contaminated standing water into the tank inlet. This is worse than having no diverter because the standing water in a sealed PVC chamber in Australian summer heat (40°C+ ambient, far higher inside a dark pipe) becomes a concentrated bacterial incubator.
3. Installing the diverter after the tank inlet. Sounds obvious, but the diverter must be plumbed between the downpipe and the tank. If it is installed on a branch line after the tee that feeds the tank, first flush water enters the tank before ever reaching the diverter.
4. No leaf screen upstream. Without a gutter guard or leaf screen on the downpipe, leaves and twigs can jam the diverter chamber, block the tee fitting, or clog the ball valve. The diverter handles dissolved and fine particulate contamination — it is not designed to handle full leaves and branches. Leaf screening is a separate, upstream job.
5. Ignoring the diverter chamber in winter. In frost-prone areas of inland NSW, Victoria, and Tasmania, water in the diverter chamber can freeze. Expanding ice can crack PVC fittings and push joints apart. If you are in a frost zone, drain the chamber manually before overnight temperatures drop below 0°C, or install a drain valve that allows full emptying.
6. Relying on the diverter as the sole treatment. A first flush diverter removes the worst slug of contamination, but it does not make water potable. Dissolved contaminants, bacteria that survive in moderate concentrations, and chemical contamination (agricultural spray drift, road runoff that reaches the roof via wind) all pass through a first flush diverter unchanged. If you drink your tank water, you need downstream filtration and UV treatment. No exceptions.
Final Verdict
A first flush diverter is the cheapest, simplest, and most impactful single improvement you can make to an Australian rainwater tank system. At $50-200 for a commercial unit or $30-60 for a DIY build, it removes the most contaminated slug of roof runoff before it reaches your storage, protects your pump from abrasive sediment, extends the life of every downstream filter, and meaningfully improves the quality of your stored water.
For most Australian homes, a standpipe-type diverter sized at 1 litre per square metre of connected roof area is the right answer. Size it up by 25-50% if you are in a dusty, dry, or bushfire-prone area. Clean it quarterly. And remember — it is stage 2 of a multi-barrier system, not a standalone treatment. Pair it with sediment filtration, carbon, and UV for any water you intend to drink.
If you are setting up or upgrading a tank water system, read our rainwater drinking safety guide for the full picture on making Australian tank water safe, and our best bore and tank water filter rankings for the downstream filtration that makes the diverter’s job worthwhile.
Filtering your tank water for drinking?
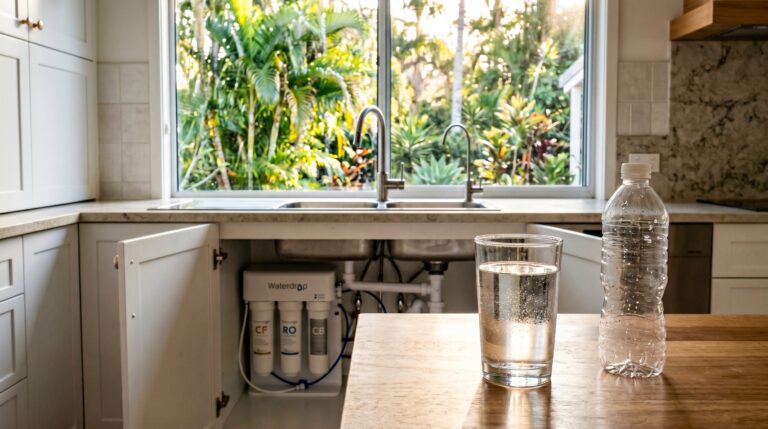
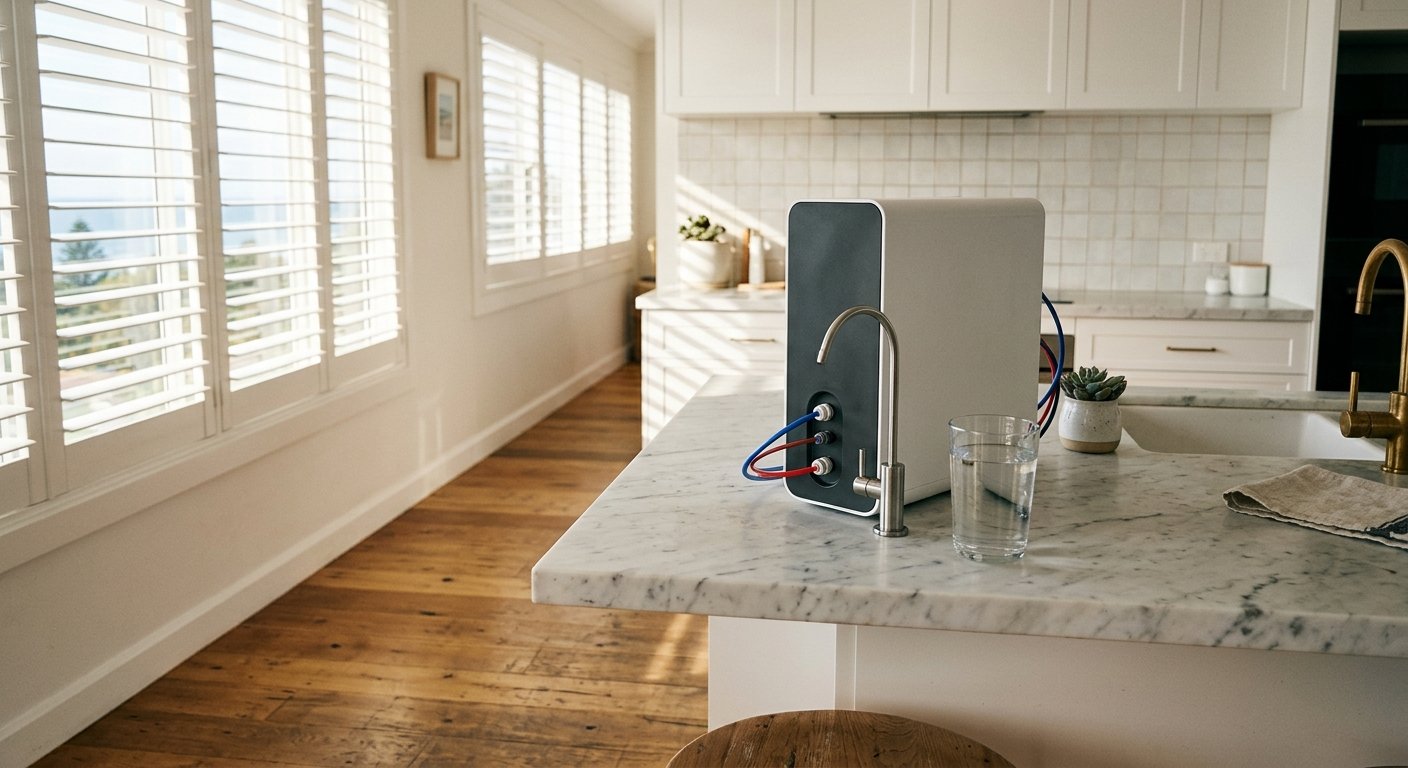
A first flush diverter handles the coarse contamination. For the dissolved stuff — PFAS, heavy metals, bacteria, chemical traces — you need proper filtration downstream. The Waterdrop X8 under-sink RO is certified to NSF/ANSI 42, 58 and 372 and lists PFOA, PFOS, lead and fluoride among the contaminants it reduces. Pair it with a UV steriliser for tank water: RO is not a bacteria barrier on its own.
Last reviewed: August 2026 – Clean and Native
Frequently Asked Questions
What does a first flush diverter do on a rainwater tank?
A first flush diverter captures the initial slug of contaminated roof runoff — containing bird droppings, dust, pollen, and debris — and diverts it away from your tank. Once the diverter chamber fills with dirty water, clean rainwater bypasses it and flows into the tank. The captured dirty water slowly drains out through a weep hole or drain valve between rain events.
How big should a first flush diverter be in Australia?
The standard Australian rule of thumb is 1 litre of diverter capacity per square metre of connected roof area. A 100 m² roof needs a 100-litre diverter. In dusty, dry, or bushfire-prone regions like Perth, Adelaide, inland NSW, or western QLD, increase that by 25-50%.
Does a first flush diverter make rainwater safe to drink?
No. A first flush diverter removes the most contaminated initial runoff, but it does not filter, disinfect, or treat the water. For drinking, you still need downstream sediment filtration, carbon filtration, and UV sterilisation at minimum. The diverter is stage 2 of a multi-barrier system, not a standalone treatment.
How often should you clean a first flush diverter?
Every 3 months at minimum. Monthly in high-contamination areas (dusty regions, heavy tree canopy, or pollen season). Drain the chamber completely, clear the weep hole of debris, and flush with a garden hose. After extended dry periods (4+ weeks), drain manually before the next rain to ensure full capacity is available.
What is the difference between a standpipe and valve-based first flush diverter?
A standpipe uses a vertical PVC pipe that fills with dirty water; clean water overflows into the tank once the pipe is full. It has no moving parts and costs $30-180. A valve-based diverter uses a floating ball or mechanical valve to seal the chamber once full, providing a more precise cutover. It costs $120-300 and requires more maintenance due to moving parts.
Can you build a first flush diverter yourself?
Yes. A DIY standpipe diverter can be built from standard 90mm PVC stormwater pipe, a tee fitting, an end cap, and a small brass weep fitting. Total material cost is typically $30-60 from any plumbing supply outlet. Most competent DIYers can complete the installation in under two hours.
What happens if the first flush diverter weep hole gets blocked?
If the weep hole clogs, the chamber never empties between rain events. The next rain pushes stagnant, concentrated contamination directly into your tank — this is worse than having no diverter at all. In Australian summer heat, sealed PVC chambers can reach temperatures far above ambient, accelerating bacterial growth in the standing water. Clear the weep hole at every quarterly maintenance check.
Do Australian councils require first flush diverters on rainwater tanks?
Requirements vary by council and state. Some NSW and QLD councils require first flush diverters as a condition of development approval for new builds that include rainwater tanks. Sydney Water recommends first flush devices as part of their published tank maintenance guidance. Check with your local council’s development assessment team for specific requirements in your area.
How much does a first flush diverter cost in Australia?
Pre-made commercial units cost $50-200 for standpipe designs and $120-300 for valve-based models. DIY builds from PVC components cost $30-60 in materials. Professional plumber installation adds $100-250 depending on access and complexity. The total investment is typically recovered within one year through reduced downstream filter replacement costs.
Does Perth or Adelaide need a bigger first flush diverter than Melbourne?
Yes. Perth and Adelaide experience longer dry periods between rain events, meaning more contamination accumulates on roofs before each rainfall. Perth in particular receives almost no rain from December to April. The recommendation for these cities is to size diverters 25-50% above the 1 L/m² baseline. Melbourne, with more frequent rainfall year-round, can typically use the baseline 1 L/m² figure.
Get the Australian Home Environment Checklist
30 checks across water, air and EMF. Most of them free. Ranked by impact.
No spam. Unsubscribe any time.

Former Royal Australian Navy Clearance Diver and TAG-E counter-terrorism operator. Founded Clean and Native to apply the same rigorous thinking to the home environment.
Full biography →