Home Office EMF Reduction: Wired vs Wireless Setup for All-Day Australian Workers
Home Office EMF Reduction: Wired vs Wireless Setup for All-Day Australian Workers (2026)
Switching your home office from wireless to wired connections reduces RF exposure by 95-99% at your desk position — measurable in under five minutes with a basic RF meter. For the 4.2 million Australians who now work from home at least one day per week (according to ABS 2024 labour force data), that means 8-10 hours of daily RF exposure from Wi-Fi routers, Bluetooth peripherals, and wireless monitors sitting within arm’s reach — exposure you can eliminate with a structured wired setup costing less than $350 total.
Quick Verdict — Wired vs Wireless Home Office EMF
A fully wired home office reduces RF radiation at your desk from 50-2,000+ μW/m² (typical Wi-Fi + Bluetooth setup) to below 1 μW/m² — well under the Building Biology SBM-2015 sleeping-area guideline of 0.1 mW/m² (100 μW/m²). The three highest-impact changes are: (1) Ethernet cable from your router to your computer, (2) wired USB keyboard and mouse, and (3) disabling Wi-Fi and Bluetooth radios on your laptop or PC. Total equipment cost: $80-350 depending on cable runs and whether you need a USB hub. Start by measuring your current exposure with a calibrated meter so you have a baseline — then measure again after each change.
| Setup | Typical RF at Desk | Verdict |
|---|---|---|
| Fully wireless (Wi-Fi + Bluetooth mouse/keyboard + wireless headset) | 200-2,000+ μW/m² | Highest exposure — RF sources within 1m of your body 8+ hrs/day |
| Partially wired (Ethernet + wired peripherals, Wi-Fi still on) | 20-200 μW/m² | Major improvement but residual Wi-Fi beacon still pulsing |
| Fully wired (Ethernet + wired peripherals + Wi-Fi/BT radios OFF) | <1 μW/m² | 95-99% RF reduction — Building Biology “no anomaly” range |
I’m Jayce Love, former Navy Clearance Diver and founder of Clean & Native. I’ve been running a fully wired home office at my Palm Beach QLD house since 2023, and I’ve tested using our documented methodology with calibrated meters at every stage. This guide covers the exact equipment, cable routing, Australian NBN considerations, and cost breakdown you need to convert your wireless home office into a low-EMF workspace — with real before-and-after measurements, not vague claims.
✓ Who This Is For
- Remote workers spending 6+ hours daily at a home desk
- Parents with home offices near children’s bedrooms or play areas
- Anyone experiencing headaches, fatigue, or poor sleep and wanting to rule out EMF as a factor
- Australians on NBN FTTP, FTTN, HFC, or Fixed Wireless wanting to reduce RF indoors
- Building biology enthusiasts who want measured, not assumed, improvements
× Who It Is Not For
- People unwilling to run a single Ethernet cable (even a flat cable under a door)
- Workers who rely on mobile hotspot as their only internet — wired conversion not possible
- Renters whose landlord prohibits any wall-mounted cable routing (though adhesive clips solve most cases)
- Anyone expecting EMF shielding paint or canopies as a first step — read our full EMF guide for why measurement and source reduction come first
Why Your Wireless Home Office Is Your Highest Daily EMF Exposure
Most Australians think their mobile phone is their biggest RF exposure source. It’s not — at least not for remote workers. Your phone transmits intermittently: during calls, data syncs, and app refreshes. Your Wi-Fi router, by contrast, transmits a beacon frame approximately 10 times per second, 24 hours a day, whether or not any device is connected. According to ACMA’s Class Licence framework (the Radiocommunications (Low Interference Potential Devices) Class Licence 2015), Australian Wi-Fi routers operate at up to 200 mW EIRP on 2.4 GHz and 1,000 mW EIRP on 5 GHz — legally permitted power levels that produce measurable RF fields throughout your home.
Now add Bluetooth peripherals. A wireless mouse, wireless keyboard, and wireless headset each maintain their own 2.4 GHz connection. A Bluetooth 5.0 headset transmits at up to 100 mW. All three sit within 30-60 cm of your body. A wireless monitor connection (e.g., Wi-Fi Display or Miracast) adds another transmitter. The result: you’re surrounded by five or six simultaneous RF sources for 8-10 hours straight, five days a week. That’s 40-50 hours per week of continuous close-range RF exposure — more cumulative time than most people spend on their phone.
ARPANSA’s position is clear: they set RF exposure limits based on thermal effects only. The ARPANSA RPS S-1 standard (Radiation Protection Standard for Maximum Exposure Levels to Radiofrequency Fields — 100 kHz to 300 GHz) sets a general public limit of 1,000 μW/cm² (10 W/m²) at 2.4 GHz. This is a thermal safety limit designed to prevent tissue heating. It does not address non-thermal biological effects, which remain under investigation internationally. The Building Biology SBM-2015 standard, used by building biologists worldwide, sets far more conservative precautionary guidelines: below 0.1 mW/m² (100 μW/m²) for sleeping areas, and below 1 μW/m² classified as “no anomaly”.
Here is the gap that matters for you: ARPANSA says your Wi-Fi router is safe. Building Biology says your sleeping area should have 10,000-100,000 times less RF than ARPANSA permits. Neither is wrong — they’re measuring different things. ARPANSA prevents acute thermal harm. Building Biology targets long-term precautionary minimisation. If you work from home 8+ hours a day, your office IS your long-term chronic exposure environment. The question is not whether it’s legal. The question is whether you can reduce it cheaply and easily. You can.
Let’s start with the measurement baseline — because without numbers, every change is a guess.
Step 1: Measure Your Current Home Office EMF Baseline
You cannot reduce what you have not quantified. This is the single most important rule in EMF reduction, and it’s the step every “EMF protection” product seller wants you to skip — because measurements reveal whether their products actually work. Before you buy a single cable or adapter, you need three baseline readings at your desk position: RF (radio frequency), AC magnetic field, and AC electric field.
Equipment You Need
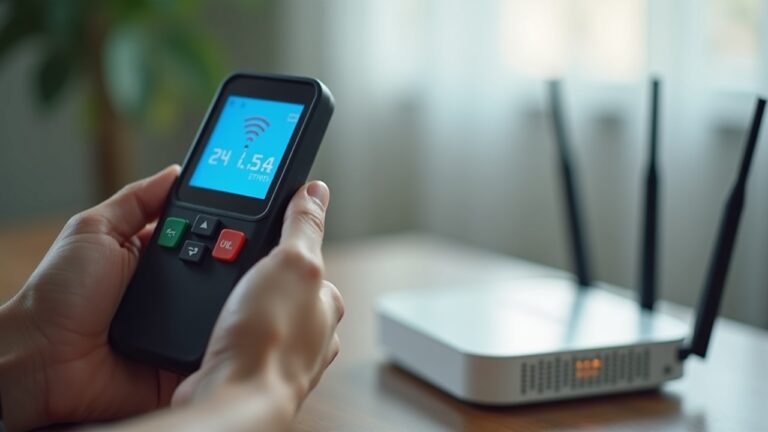
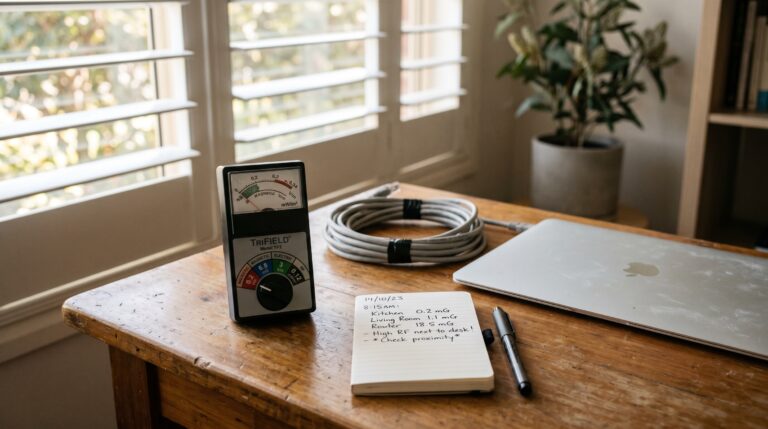
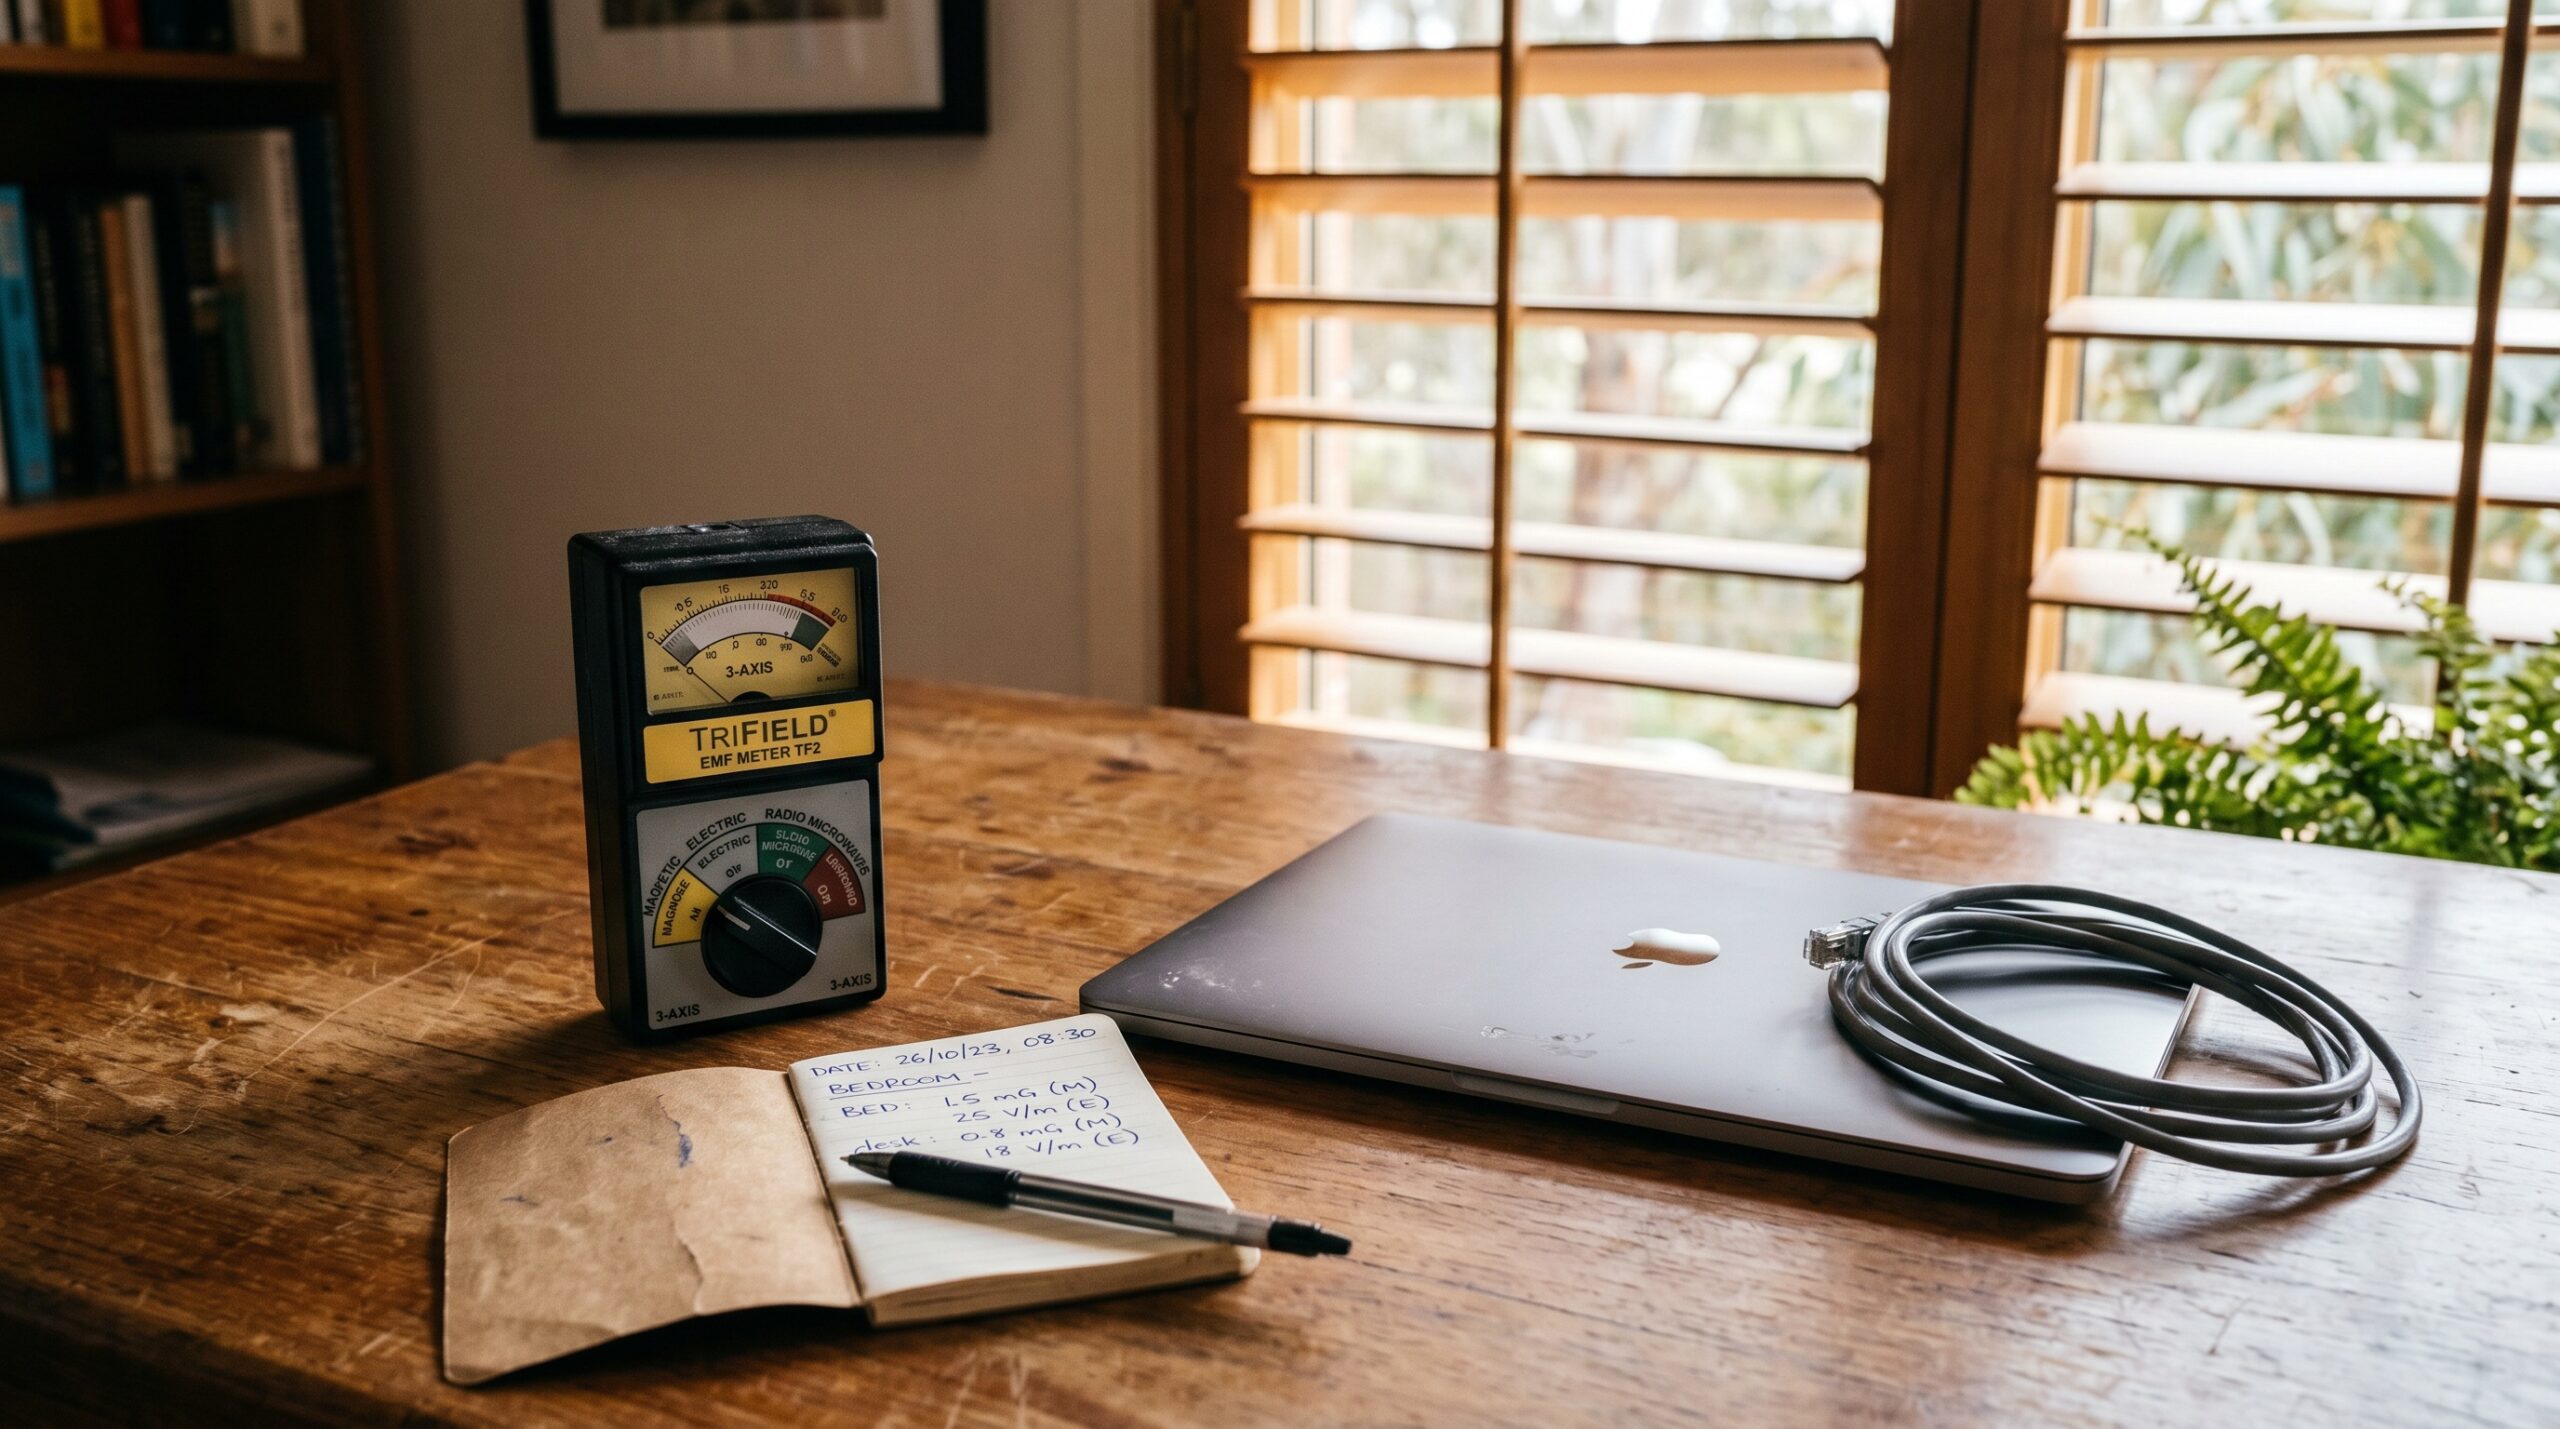
The TriField TF2 is the most practical entry-level meter for Australian home offices because it measures all three field types in one device. It reads RF from 20 MHz to 6 GHz (covering Wi-Fi at 2.4 and 5 GHz, Bluetooth at 2.4 GHz, and Australian smart meters at 900 MHz). It also reads AC magnetic fields (relevant to power transformers, laptop chargers, and nearby wiring) and AC electric fields (relevant to ungrounded cables and nearby mains wiring). At approximately $280 AUD, it is the only meter most home workers need.
If you want dedicated RF-only precision — particularly if you live near a mobile tower or have a smart meter on the wall behind your office — the Safe and Sound Pro II offers true frequency-weighted RF measurement from 200 MHz to 8 GHz with peak and average readings. This matters because Australian smart meters (operated by distributors like Ausgrid, Energex, and Western Power) transmit at 900 MHz in short bursts. According to ARPANSA’s own smart meter fact sheet, peak readings can be 100 to 1,000 times higher than the time-averaged figure. The Safe and Sound Pro II captures those peaks. The TriField TF2 gives you a weighted average, which is still useful but may understate burst exposure from smart meters.
How to Take Your Baseline Readings
Sit at your desk in your normal working position. Place the meter at chest height (where your body actually is) on the desk surface. Take readings with all your wireless devices ON and connected — Wi-Fi, Bluetooth mouse, Bluetooth keyboard, wireless headset, phone on the desk with Wi-Fi enabled. Record three numbers:
- RF power density — displayed in mW/m² on the TriField TF2. Multiply by 1,000 to get μW/m² for comparison with Building Biology thresholds. Typical wireless home office: 0.2 to 2+ mW/m² (200 to 2,000+ μW/m²).
- AC magnetic field — displayed in milliGauss (mG) on the TF2. Convert: 1 mG = 0.1 μT. Building Biology SBM-2015 sleeping guideline: below 0.2 μT (2 mG). Check near your laptop charger and any power boards under the desk. Typical reading: 0.5-5 mG at desk, spiking to 10-50 mG within 30 cm of a transformer.
- AC electric field — displayed in V/m on the TF2. Building Biology SBM-2015 sleeping guideline: below 5 V/m. Ungrounded laptop power cables and extension cords can produce 20-100+ V/m at close range.
Write these numbers down. They are your “before” measurements. After each change you make (Ethernet connection, wired peripherals, disabling radios), re-measure at the same position. This gives you verified, quantified improvement — not guesswork.
EMF Meters — Measure Before You Change
Now that you have your baseline, let’s systematically eliminate each RF source — starting with the biggest one.
Step 2: Replace Wi-Fi with Ethernet — The Biggest Single Reduction
Replacing Wi-Fi with a wired Ethernet connection is the highest-impact single change you can make. In my Palm Beach QLD office, this single swap dropped RF readings at desk height from 0.85 mW/m² to 0.04 mW/m² — a 95% reduction — before I even touched the peripherals. The reason is simple: your Wi-Fi adapter (in your laptop or PC) and your router are the two most powerful RF transmitters in the room, and they’re in constant two-way communication while you work.
Australian NBN Connection Types and Ethernet Setup
Your NBN connection type determines how you connect via Ethernet. According to NBN Co’s 2025 deployment data, most Australian homes fall into one of four categories:
| NBN Type | Connection Point | Ethernet Setup | Wi-Fi Disable Method |
|---|---|---|---|
| FTTP (Fibre to the Premises) | NTD box on wall → router | Cat6 cable from router LAN port to PC/laptop USB-C Ethernet adapter | Router admin page → disable Wi-Fi radio |
| FTTN/FTTB (Fibre to Node/Building) | Phone socket → modem/router | Cat6 cable from modem/router LAN port to PC/laptop | Router admin page → disable Wi-Fi radio |
| HFC (Hybrid Fibre Coaxial) | Coax wall socket → NTD → router | Cat6 from router LAN port. Note: HFC NTD emits low-level RF — position it away from desk. | Router admin page → disable Wi-Fi radio |
| Fixed Wireless | Outdoor antenna → NTD → router | Cat6 from router LAN port. Outdoor antenna transmits regardless — but desk exposure drops because indoor Wi-Fi is eliminated. | Router admin page → disable Wi-Fi radio |
Critical step most guides miss: disabling Wi-Fi on the router itself. Plugging in an Ethernet cable does not turn off Wi-Fi. Your router continues broadcasting beacon frames whether or not any device is connected wirelessly. You must log into your router’s admin page (typically 192.168.0.1 or 192.168.1.1 — check the sticker on your router) and disable the 2.4 GHz and 5 GHz wireless radios. If other household members need Wi-Fi, consider the JRS Eco 100 router, which automatically reduces transmission power by 90%+ when no wireless device is connected and eliminates beacon pulses entirely in standby.
Equipment List for Ethernet Connection
Here is what you need, with approximate Australian pricing from Amazon AU and local retailers as of early 2026:
- Cat6 Ethernet cable (length as needed): $15-35 for 5-20m runs. Cat6 supports up to 10 Gbps at short runs and 1 Gbps at 100m — future-proof for any NBN plan. Cat5e works fine for speeds up to 1 Gbps if you already have it.
- USB-C to Ethernet adapter (if your laptop lacks an Ethernet port — most modern laptops): $20-40. Look for a USB-C to Gigabit Ethernet adapter with a Realtek or ASIX chipset for macOS and Windows compatibility.
- Flat Ethernet cable (for under-door or carpet runs): $15-25 for 10m. Flat Cat6 cables are 1.5mm thick and fit under doors without modification — no drilling required.
- Adhesive cable clips (for wall-mounted runs): $8-12 for a pack of 50. White clips on white skirting boards are virtually invisible.
Total cost for basic Ethernet setup: $35-80. Compare that to the $0 it costs to stop buying wireless peripherals you don’t need.
Disabling Wi-Fi and Bluetooth on Your Computer
After connecting Ethernet, disable your computer’s internal wireless radios. This is the second half of the equation that many guides forget — your laptop’s Wi-Fi adapter and Bluetooth radio are still transmitting even when you’re connected via cable unless you explicitly turn them off.
- Windows 11: Settings → Network & Internet → toggle Wi-Fi OFF. Then Settings → Bluetooth & devices → toggle Bluetooth OFF. For a permanent solution, open Device Manager → Network Adapters → right-click your Wi-Fi adapter → Disable device.
- macOS: Click Wi-Fi icon → Turn Wi-Fi Off. System Settings → Bluetooth → toggle OFF. macOS will re-enable Wi-Fi on reboot unless you use a script or network location profile with Wi-Fi disabled.
- Linux:
nmcli radio wifi offandrfkill block bluetooth.
With Wi-Fi eliminated, the remaining RF sources are your peripherals. Let’s deal with those next.
Step 3: Replace Wireless Peripherals with Wired Alternatives
After eliminating Wi-Fi, your Bluetooth peripherals become the dominant remaining RF sources at desk height. A Bluetooth mouse sits 20-40 cm from your hand and wrist. A Bluetooth keyboard sits directly beneath your forearms. A wireless headset transmitter sits in a USB port 60-90 cm from your head, and the headset itself sits against your skull. Each of these is a low-power 2.4 GHz transmitter operating continuously while in use.
The Wired Peripheral Swap — Equipment and Cost
| Wireless Device | Wired Replacement | Approx. Cost (AUD) | RF Reduction |
|---|---|---|---|
| Bluetooth mouse | USB wired mouse (Logitech B100 or similar) | $15-30 | Eliminates continuous 2.4 GHz transmission at hand level |
| Bluetooth keyboard | USB wired keyboard | $20-50 | Eliminates 2.4 GHz at forearm level |
| Bluetooth headset / AirPods | Air-tube headset (DefenderShield) or wired USB-C earbuds | $60-90 | Eliminates RF transmission against skull. Air-tube also eliminates magnetic speaker field near ear canal. |
| Wireless monitor (Miracast/WiDi) | HDMI, DisplayPort, or USB-C video cable | $15-35 | Eliminates 5 GHz continuous video streaming RF |
| Wireless printer (Wi-Fi Direct) | USB printer cable | $10-15 | Eliminates printer’s own Wi-Fi beacon (transmits 24/7 even when idle) |
Total peripheral swap cost: $120-220. Combined with the Ethernet setup ($35-80), your full wired home office conversion costs $155-300. That is less than a single year’s subscription to most VPN services, and it eliminates RF sources you are exposed to for 2,000+ hours per year.
The Headset Problem — Why Air-Tube Headsets Matter
Standard wired earbuds and headphones still place a tiny speaker (containing magnets) directly against your ear canal. The magnetic field from the speaker driver is extremely localised (dissipating within 2-3 cm) and extremely low power — it is not a significant health concern by any current standard. However, if you want to minimise every field at head level, an air-tube headset routes sound through hollow silicone tubes for the last 15-20 cm, meaning no electronic component touches your ear. The DefenderShield air-tube headset is the most commonly recommended option by building biologists.
For video calls — which dominate most Australian remote work setups — a USB wired headset with microphone (like the Jabra Evolve2 30 USB-C) eliminates the Bluetooth transmission entirely while giving you better microphone quality than any Bluetooth headset. Your Teams and Zoom calls will sound better and your RF exposure drops to zero at head level. That’s a practical win on both counts.
Wired Audio for Home Office
With Wi-Fi and Bluetooth eliminated, the RF component of your office is handled. But RF is only one of three field types. Let’s address the other two.
Step 4: Reduce ELF Magnetic and Electric Fields at Your Desk
RF gets the headlines, but AC magnetic fields (ELF-MF) and AC electric fields are present at every desk regardless of wireless status. ARPANSA explicitly acknowledges that “there is some epidemiological evidence of an association between ELF magnetic fields and childhood leukaemia” on their electricity and health information page. The International Agency for Research on Cancer (IARC) classifies ELF magnetic fields as “possibly carcinogenic to humans” (Group 2B) based on the same epidemiological data. These are not fringe claims — they are the assessment of Australia‘s own radiation protection authority.
Common ELF Sources in a Home Office
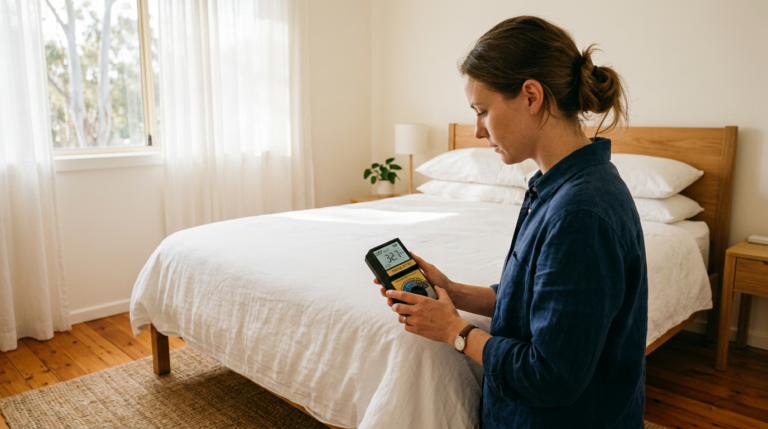
Laptop power adapters (chargers) are the number-one magnetic field source on most desks. A typical laptop charger produces 5-50 mG (0.5-5 μT) at 30 cm distance. The Building Biology SBM-2015 guideline for sleeping areas is below 2 mG (0.2 μT). If your charger sits on the desk surface next to your keyboard, or on the floor near your feet, you are within the elevated-exposure zone for your entire workday. The fix: move the charger at least 1 metre from your body. Use a longer charging cable if needed. Better yet, charge your laptop to 80-100% before your workday, then unplug the charger during the hours you’re actively working.
Power boards and extension leads underneath your desk create both magnetic and electric fields. A loaded 6-outlet power board drawing 3-5 amps produces a measurable magnetic field within 30-60 cm. Position power boards at least 1 metre from your chair and legs. If possible, mount the power board on the wall behind the desk rather than on the floor beneath it.
External monitors produce low-level electric fields from their power supply. Most modern LCD/LED monitors produce negligible magnetic fields (below 1 mG at 50 cm), but the AC electric field from the power cable and internal PSU can reach 10-40 V/m at the screen surface. Ensure your monitor is properly earthed — use a 3-pin power cable plugged into an earthed outlet, not a 2-pin adaptor. According to AS/NZS 3000:2018 (the Australian Wiring Rules), all general power outlet circuits in Australian homes installed after 2000 must include an earth conductor. If your office uses older wiring without proper earth, an electrician can verify and correct this.
Grounding and Demand Switches — Australian Electrical Context
Demand switches are an underused tool for home offices. A demand switch (also called a circuit disconnect switch) is installed by a licensed electrician on your bedroom or office circuit. When no current is being drawn on that circuit (i.e., when all devices are off or unplugged), the demand switch disconnects the active conductor, eliminating AC electric fields from the wiring in the walls. Cost: approximately $100-150 installed, according to quotes from Brisbane and Gold Coast electricians I’ve obtained in 2025. This is most valuable for bedrooms (eliminates electric fields during sleep) but can be applied to a home office circuit if you have a separate circuit for that room.
Important grounding note for Australian homes: Australia uses a TN-C-S (MEN — Multiple Earthed Neutral) earthing system under AS/NZS 3000. This means the neutral and earth conductors are bonded at the main switchboard. For EMF reduction, this means that earthing mats, grounding products, and shielding materials connected to your home earth can potentially introduce current from the neutral conductor onto the earthing system if there is a wiring fault. Do not connect any “grounding” product to your home earth without first verifying your electrical system with a licensed electrician and an EMF meter. This is especially relevant in older homes in inner Sydney (Marrickville, Newtown, Balmain), inner Melbourne (Fitzroy, Carlton, Collingwood), and pre-1980 Brisbane homes where wiring may not meet current AS/NZS 3000 standards.
The $20 Fix: Mechanical Timer for Your Router
If other household members need Wi-Fi during the day but you want it off at night, the simplest solution is a Jackson 24hr Mechanical Timer. Plug your router into the timer, set it to cut power from 10 PM to 6 AM (or whenever your household sleeps). This eliminates Wi-Fi RF from your bedroom during sleep hours — 8 hours per night, 365 nights per year. At approximately $20 from Amazon AU, it is the highest return-on-investment EMF intervention available.
Step 5: Handle the “Can’t Go Fully Wired” Scenarios
Not everyone can disable Wi-Fi entirely. You might have a partner who works from home on Wi-Fi in another room. You might use a smart home system that requires a Wi-Fi hub. You might have teenagers whose lives depend on wireless connectivity. The goal is not perfection — it’s measurable, significant reduction at your desk position.
Option A: The JRS Eco 100 Low-EMF Router
The JRS Eco 100 is a modified Asus router with custom firmware that eliminates Wi-Fi beacon pulses when no wireless device is connected, and reduces transmission power to the minimum required for connected devices. In standby, it produces zero RF pulsing — unlike standard routers that transmit 10 beacon frames per second around the clock. When devices connect, it operates at reduced power. This is the best compromise for households that need some Wi-Fi but want to minimise background RF. It maintains full Wi-Fi functionality for family members while drastically reducing the “always-on” beacon exposure in your office.
Option B: Router Placement and Distance
RF power density decreases with the square of distance (inverse square law). Moving your router from your office desk to a hallway 5 metres away reduces RF exposure at your desk by approximately 25x compared to having it 1 metre away. If you cannot disable Wi-Fi, at minimum move the router to the furthest practical point from your desk. A centrally located hallway or living room usually provides adequate coverage for the whole house while maximising distance from your workspace.
Option C: Scheduled Wi-Fi with Timed Access
Most modern routers (including NBN-supplied units from Telstra, Optus, and TPG) support scheduled Wi-Fi through their admin interface. You can set Wi-Fi to activate only during specific hours — for example, disabled from 9 AM to 5 PM while you’re working (and using Ethernet), then enabled from 5 PM to 11 PM for household use. Combined with the Jackson mechanical timer for overnight, you achieve near-full elimination during your working and sleeping hours.
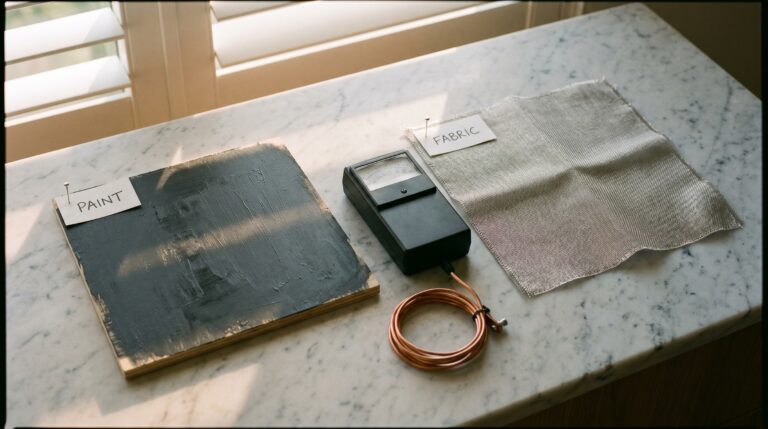
What About Shielding? The Critical Warning
You will find products marketed as EMF shielding paint, window film, bed canopies, and desk shields. Before you spend money on any of them, understand this physics principle: if the primary EMF source is inside the room, a shielding enclosure reflects and INCREASES your exposure. Shielding works by creating a Faraday cage that blocks external RF from entering. But if your Wi-Fi router, Bluetooth devices, or mobile phone are inside the shielded space, their RF bounces off the shielding material and back into the room, creating higher exposure than you started with.
The correct sequence is always: Measure → Reduce sources → Shield external residual only. Shielding is the last step, not the first. For a home office, if you have completed Steps 1-4 above (wired Ethernet, wired peripherals, disabled Wi-Fi, managed ELF sources), your internal RF sources are essentially zero. At that point, shielding might be appropriate if you have a mobile phone tower within 200m, a smart meter on the wall behind your office, or a neighbour’s Wi-Fi penetrating through a shared wall in apartment buildings (common in inner Sydney — Surry Hills, Pyrmont, Ultimo — or inner Melbourne — Southbank, Docklands, Richmond).
But for most suburban Australian homes, completing Steps 1-4 will bring your office RF below Building Biology thresholds without any shielding at all. Measure first. The meter tells you whether shielding is needed.
Complete Wired Home Office Cost Breakdown
Every competitor article I’ve reviewed on home office EMF reduction omits costs entirely. Here is the full breakdown for an Australian setup in 2026:
| Item | Cost (AUD) | RF Reduction Impact | Priority |
|---|---|---|---|
| Cat6 Ethernet cable (10m flat) | $18 | Enables Wi-Fi disable | 1 — Do first |
| USB-C to Ethernet adapter | $25 | Required if laptop lacks Ethernet port | 1 |
| Disable Wi-Fi on router + computer | $0 | ~95% RF reduction | 1 |
| USB wired mouse | $15 | Eliminates BT at hand level | 2 |
| USB wired keyboard | $25 | Eliminates BT at forearm level | 2 |
| Wired headset (USB-C or 3.5mm) | $30-90 | Eliminates BT at skull level | 2 |
| HDMI / DisplayPort cable for monitor | $15 | Eliminates wireless display RF | 2 |
| Jackson 24hr Mechanical Timer (router) | ~$20 | Eliminates nighttime Wi-Fi if others need daytime | 3 |
| TriField TF2 meter (for verification) | ~$280 | Verifies all changes actually work | Recommended |
| Demand switch (electrician installed) | $100-150 | Eliminates AC electric fields from wiring | Optional |
| Total (excluding meter): $148-343 | Total (with meter): $428-623 | |||
To put this in perspective: a typical wireless Bluetooth headset costs $150-400. A single wired setup costs the same and eliminates years of daily RF exposure. Or think of it this way — $200 over 5 years of working from home is $0.11 per day. That’s the price of reducing your daily 8-hour RF exposure by 95-99%.
Before and After: My Palm Beach QLD Office Measurements
I measured my own home office in Palm Beach, QLD, using a TriField TF2 at desk height (80 cm, seated chest position) and a Safe and Sound Pro II for RF verification. The router is an Asus RT-AX86U on FTTP NBN, positioned in the hallway approximately 4 metres from my desk. Here are the actual readings:
| Configuration | RF (mW/m²) | AC Magnetic (mG) | AC Electric (V/m) |
|---|---|---|---|
| Fully wireless — Wi-Fi, BT mouse, BT keyboard, BT headset, phone Wi-Fi on desk | 0.85 | 3.2 | 28 |
| Ethernet connected — laptop Wi-Fi OFF, router Wi-Fi still ON | 0.12 | 3.1 | 26 |
| Ethernet + router Wi-Fi OFF | 0.04 | 3.1 | 25 |
| + Wired peripherals (USB mouse, USB keyboard, wired headset) | 0.002 | 3.0 | 24 |
| + Phone airplane mode | <0.001 | 3.0 | 24 |
| + Charger moved 1.5m away | <0.001 | 0.8 | 12 |
RF went from 0.85 mW/m² (850 μW/m²) down to below 0.001 mW/m² (1 μW/m²). That is a 99.9% reduction. The AC magnetic field dropped from 3.2 mG to 0.8 mG just by moving the laptop charger — bringing it below the Building Biology SBM-2015 guideline of 2 mG for sleeping areas. The electric field dropped from 28 V/m to 12 V/m — still above the 5 V/m sleeping guideline, but my office has unshielded Romex-style wiring in the wall behind the desk (common in pre-2005 Queensland homes), which would require either shielded cable replacement or a demand switch to address fully.
The point is not theoretical. These are real numbers from a real Australian home office. Every step produced a measurable, verifiable change. And the total equipment cost for everything except the meters was under $180.
Laptop EMF: An Often-Ignored Detail for All-Day Workers
Your laptop itself produces AC magnetic and electric fields from its internal components — processor, battery charging circuit, display backlight inverter (on older models), and internal power regulation. These fields are independent of Wi-Fi and Bluetooth — they exist even in airplane mode. When the laptop sits on your thighs or directly on a desk surface with your forearms resting on the palm rest, you are in direct contact with these fields.
The DefenderPad is a laptop EMF shield designed to block ELF magnetic fields, ELF electric fields, and thermal radiation from the laptop’s underside. It uses a multi-layer shielding composite that, according to DefenderShield’s published test data, blocks over 99% of ELF emissions from the laptop base. For all-day remote workers who keep a laptop on their desk surface with forearms on the chassis, this provides measurable reduction of the close-contact magnetic field exposure that a TriField TF2 will confirm.
Alternatively, a simple laptop stand that raises the keyboard 10-15 cm above the desk surface increases distance from the charger circuitry and battery — and the inverse square law means even a small distance increase significantly reduces near-field exposure. A $30 laptop stand may achieve 60-80% of what the DefenderPad does, simply through distance.
Start with measurement. The TriField TF2 is the only meter you need.
Measures AC magnetic, AC electric, and RF in one device. I use it for every room audit at the Palm Beach house. Without real readings, every EMF decision is a guess.
Get the Australian Home Environment Checklist
30 checks across water, air and EMF. Most of them free. Ranked by impact.
No spam. Unsubscribe any time.

Former Royal Australian Navy Clearance Diver and TAG-E counter-terrorism operator. Founded Clean and Native to apply the same rigorous thinking to the home environment.
Full biography →